Composition and microstructure
Analytical Scanning Electron Microscope SU-70 Hitachi SU-70
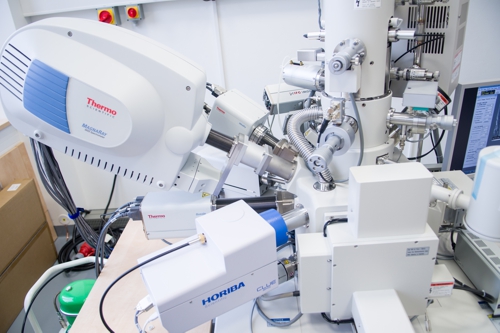 Analytical scanning electron microscope allows one to image and analyse the surface of solids with high resolution (up to 1 nm). The microscope is optimized for low-voltage imaging (resolution 1.6 nm at 1 kV).
In addition to electron imaging using SE, BSE and TE detectors, it is possible to use EDS, WDS, EBSD or CL analyses.
Additional devices: Q150T coater (Quorum Technologies), ion milling system IM4000 (Hitachi), plasma discharge Zone Cleaner (Hitachi), precision ion polishing system for TE samples PIPS II (Gatan).
Atomic force microscope AIST-NT SmartSPM
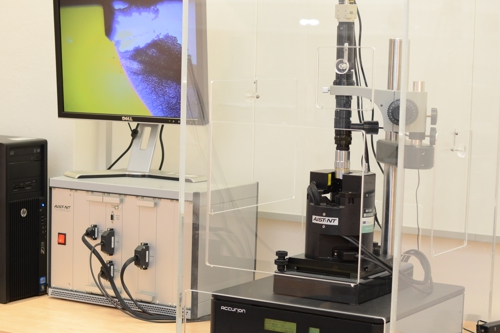 Microscope allows one the 3D mapping of material surfaces. The instrument can be used in both contact and contactless mode. It also allows to measure magnetic and electric properties of the sample surface (MFM and EFM mode, respectively) and work function of the material (Kelvin probe technique).
Specification:
• horizontal resolution: ~30 nm,
• vertical resolution: 0.1 nm.
Spectrometer Bruker Vertex 80v FT-IR
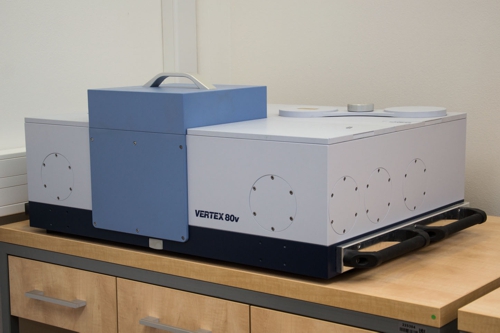 Infrared spectrometer is used for identification and structural characterization of organic and inorganic materials. It measures absorption of infrared light of a given wavelength in the analyzed material. The output is an infrared spectrum, which constitutes a dependence of (percentual) transmittance (T) or absorbance (A) on the incident light wavelength.
Raman spectroscope Horiba Jobin Yvon LABRAM HR Evolution
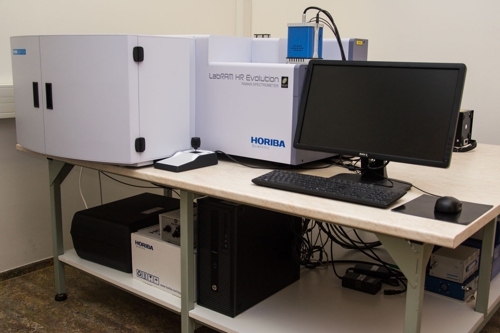 Raman spectroscope allows one to structurally characterize materials. It measures a frequency shift of a light beam after its reflection from a material. It is complementary to the infrared spectroscopy (FTIR), which registers vibrational modes leading to a dipole moment change, while Raman spectroscopy registers vibrational modes leading to a polarizability change.
Specification:
• instrument is equipped with a confocal microscope with a motorized sample holder,
• automatic mapping,
• incident wavelengths: 325, 532 and 785 nm.
X-Ray Fluorescence Spectrometer PANalytical MagiX PRO
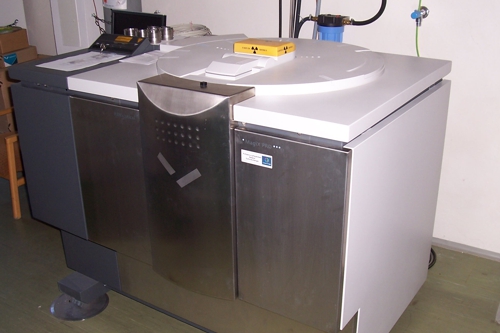 Wavelength dispersive X-Ray fluorescence spectrometer is used for qualitative and quantitative compositional analysis of solid, powder and liquid samples. Characterization of thin films is possible using a special software FP-Multi.
Specification:
• element range: Beryllium to Uranium,
• concentration range: ~ppm up to 100 at.%.
X-ray diffractometer PANalytical X’Pert PRO
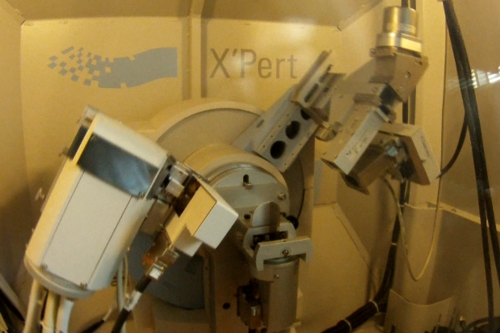 X-ray diffraction is an universal non-destructive analytical technique used for qualitative and quantitative structural and phase analysis of crystalline compounds (phases) in powder or solid samples. Furthermore, depending on a configuration of the x-ray diffractometer it allows to study the preferential orientation (texture) of a material, to measure the size and deformation of material grains, and to characterize thin film samples.
Chromatograph G10T
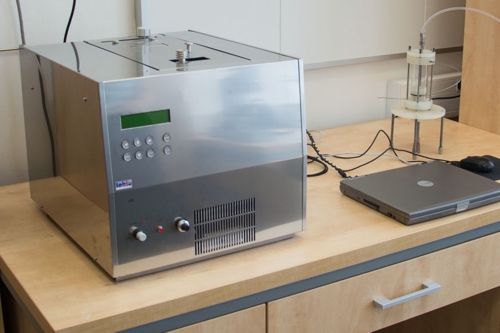 The core of the chromatograph G10T is a chromatographic column filled by a molecular sieve (5 Å), and a detector which measures the time dependence of thermal conductivity of the gas at the output of the chromatographic column. Due to different diffusion rates of various gases through the molecular sieve the instrument allows one to analyze the composition of a gas sample injected into the chromatograph. The instrument allows overpressure control (up to 2.5 bar) and temperature control (up to 450 °C) in the chromatographic column.
Mechanical properties
Microindenter Fischerscope H100
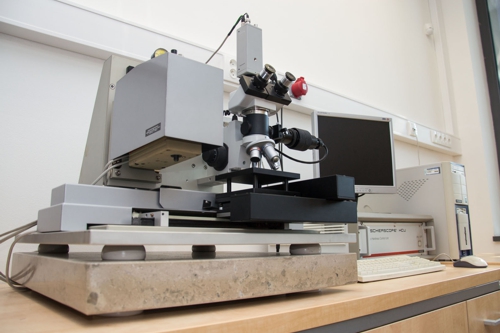 The instrument allows one to measure the complete loading-unloading curve, i.e. indentation depth - indentation load dependence and to calculate mechanical properties of materials such as hardness, elastic recovery or Young´s modulus.
Specification:
• indentation load: 0.4 – 1000 mN,
• maximum indentation,
• indenter: Vickers diamond tip (pyramid with face angles of 136°).
Hysitron TI 950 triboindenter
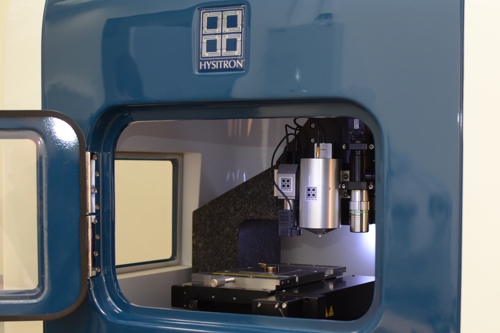 Fully automated system for quantitative measurement of local mechanical and tribological properties of solids using nano/micro indentation and nano/micro scratch-test.
Specification:
• indentation load: 1μN – 2N.
Electrical properties
Hall measurement system
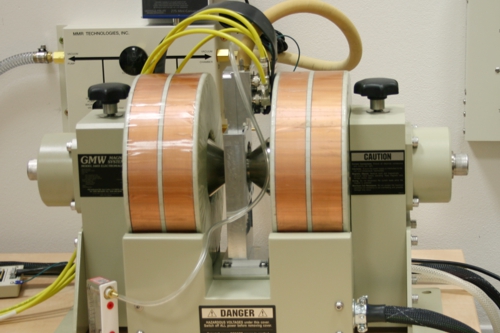 Hall measurement system is used for automated measurement of electrical resistivity of material samples, as well as the mobility and concentration of majority charge carriers in the material in a wide range of temperatures. The measurements rely on the Van der Pauw method. Square samples are mounted onto a cold stage inside a low-profile Dewar chamber placed between two electromagnets. Four spring-loaded probes provide connection with the corners of the sample. Strong magnetic field enables the measurements of low concentrations of charge carriers.
Specification:
• current source range: 10-12 – 10-2 A,
• voltage measurement range: 10-6 – 2.4 V,
• magnetic field: up to 1.4 Tesla,
• temperature range: 80 K – 730 K.
Four-point probe method
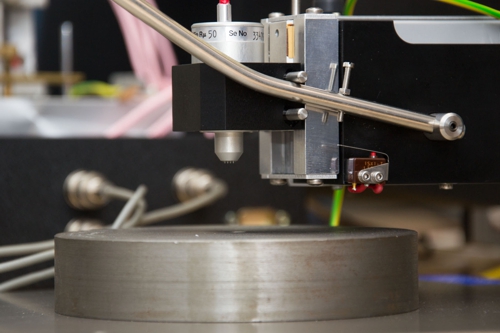 Equipment used for measurement of electrical resistivity of material samples at room or elevated temperature using four in-line pins. Samples can be heated in ambient atmosphere. The determination of electrical resistivity requires the knowledge of sample thickness.
Specification:
• pin material: Tungsten,
• pin radii (different probe heads): 50, 60, 150, 300 μm,
• maximum temperature: 600 °C.
Optical properties
Optical microscope Axio Imager.Z2m
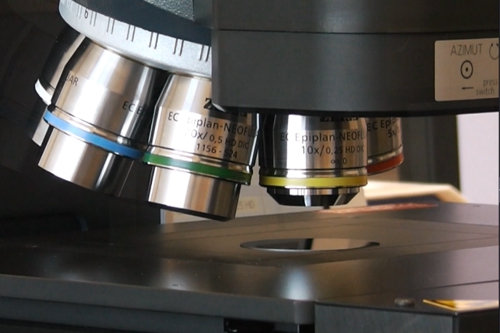 Optical microscope Axio Imager.Z2m with fully motorized stand allows one to observe materials with high magnification up to 1000x. High-resolution camera allows computer processing of the image. With the motorized Z-axis drive and the autofocus system it is possible to evaluate also the surface topology.
Contrasting techniques:
• brightfield,
• darkfield,
• circular differential interference contrast (C-DIC),
• polarization contrast.
Spektrophotometer Agilent Technologies CARY 7000
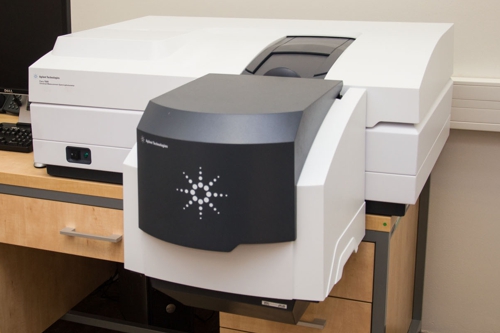 Double beam spectrophotometer to measure the transmittance and reflectance of both solid and liquid samples. The instrument is equipped with the UMA (Universal Measurement Accessory), which allows one to measure the transmittance and reflectance (in a wide range of angles and at a chosen polarization 's' or 'p') without requiring to move the sample manually when changing the measurement mode or the angle (i.e. at exactly the same spot).
Specification (without UMA accessory):
• wavelength range: 175 – 3300 nm (0.38 – 7.1 eV),
• resolution: 0.05 nm (UV and VIS) – 0.2 nm (NIR),
• photometric range of 10 absorbance units (i.e. sensitivity up to 10-10).
Specification of UMA accessory:
• wavelength range: 250 – 2500 nm,
• angle range: 5 – 85°.
Spectroscopic ellipsometer J.A. Woollam
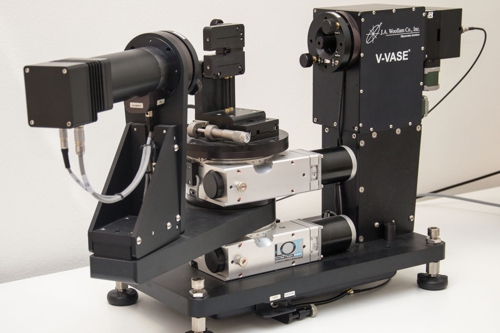 Spectroscopic ellipsometer measures optical properties of the materials. It measures the change of (generally elliptical) polarization of light after its reflection from a sample Using a proper optical model, the change of polarization can be used to calculate properties of analyzed materials (complex refractive index or complex permittivity), fundamental quantities which control the aforementioned properties (such as optical band gap) and thickness of thin films. In addition to ellipsometric measurements it allows also reflectivity and transmittance measurements.
Specification:
• wavelength range: from 250 to 2500 nm,
• measurement spot: 0.1 mm,
• cell which allows cooling (liquid nitrogen) and heating (up to 600 °C).
High-temperature annealing
Termogravimeter Setaram TAG 2400
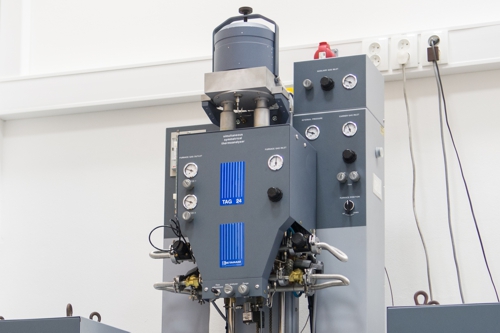 Thermogravimeter allows one to capture processes associated with sample mass change (e.g. oxdiation, volatilization).
Specification:
• heating: dynamic, isothermal,
• temperature range: 25 – 1700°C (oxidative atmosphere), 25 – 2400°C (inert atmosphere)
• heating rate : 0.1 – 99°C/min,
• atmosphere: argon, helium, synthetic air,
• resolution: 0.3 µg.
Differential scanning calorimeter Setaram Labsys DSC 1600
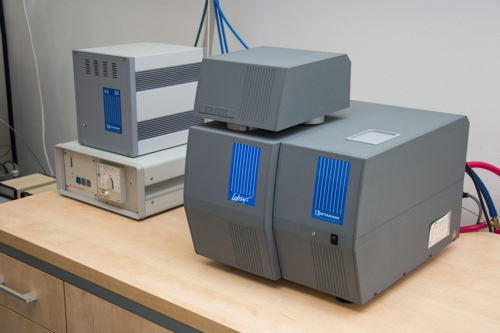 Differential scanning calorimeter allows to investigate exothermic and endothermic processes one This technique is based on measuring of the difference of heat fluxes from the analyzed and the reference sample.
Specification:
• heating: dynamic, isothermal,
• temperature range: 25 – 1600°C,
• heating rate: 0.1 – 50°C/min,
• atmosphere: argon, helium, synthetic air.
High-temperature furnace Clasic Vac 1800
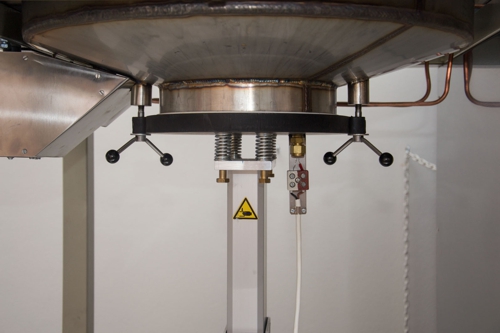 The high-temperature furnace allows long-term annealing of materials in inert or oxidative atmosphere up to 1800°C.
Specification:
• heating: dynamic, isothermal,
• temperature range: 25 – 1800°C,
• heating rate: 1 – 50°C/min,
• annealing time: 1 – 100 h,
• atmosphere: oxygen, nitrogen, argon, synthetic air.
Rapid Thermal Processor Annealsys AS-ONE 100
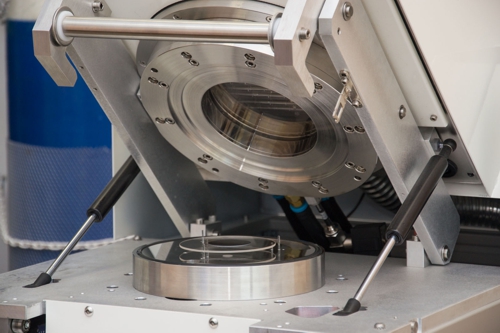 The high-speed furnace allows one annealing of materials in inert or oxidative atmosphere with very high heating rate of 200°C/s. High-speed annealing using halogen lamps in combination with high-speed cooling (thanks to the water-cooled steel chamber) allows one to investigate non-equilibrium processes.
Specification:
• maximum temperature: 1500°C,
• maximum heating (cooling) rate: 200°C/s (100°C/s),
• atmosphere: oxygen, nitrogen, argon.
Tribological properties
HT tribometer pin-on-disk CSM Instruments SA
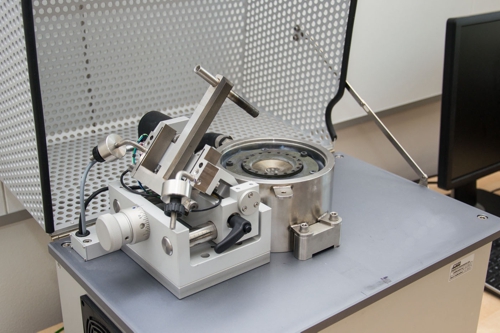 High-temperature tribometer allows one to evaluate the friction coefficient and the wear rate of characterized films at elevated temperatures. The ball wear can be characterized and quantified using optical microscopy. The film wear can be evaluated using the wear track size measured by profilometry.
Specification:
• maximum temperature: 1000 °C,
• load: 0.25 – 10 N,
• balls (diameter 6 mm): Al2O3, steel, ZrO2, Si3N4, WC, saphire, ruby.
Pin-on-disk tribometer CSM Instruments SA
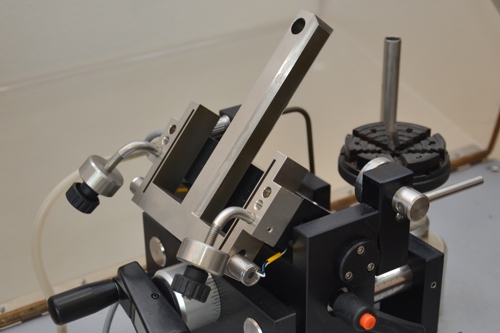 Tribometry allows one to evaluate the friction coefficient and the wear rate of characterized films. The ball wear can be characterized and quantified using optical microscopy. The film wear can be evaluated using the wear track size measured by profilometry.
Specification:
• load: 0.25 – 10 N,
• balls (diameter 6 mm): Al2O3, steel, ZrO2, Si3N4, WC.
Surface properties
Profilometer Veeco Dektak 8 Stylus
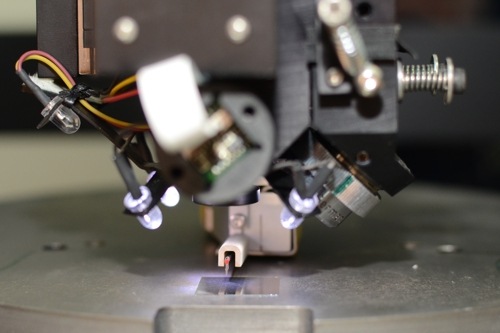 Profilometer allows one to measure the thickness of thin films, the surface roughness and curvature, and the stress in thin films.
Specification:
• load: up to 15 mg,
• vertical range: 6.5 µm – 262 µm,
• resolution: 1–40 Å (range dependent).
Krüss DSA-30 drop shape analyze
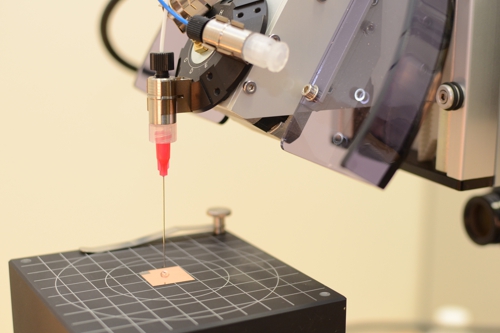 The system allows one a complex and fast measurement of static and dynamic contact angle. These measurements give an important information about surface properties especially about surface free energy. The system is equipped with fast CCD camera with scanning frequency of 61 fps (780 × 580 px) and it allows movie and automatic measurement mode.
Specification:
• contact angle range: 1 - 180°,
• resolution: 0.1°,
• surface free energy range: 1×10⁻² – 1000 mN/m (mJ/m²),
• resolution: 0.01 mN/m (mJ/m²).